
Introduction to DIY Frozen Dog Toys
When the summer heat is on, our furry friends can struggle to stay cool. One fun and effective way to help them beat the heat is with DIY frozen dog toys. Not only are these toys a cool treat for your pet, but they also provide mental stimulation and help to keep their teeth clean. In this blog post, we will explore the need for frozen dog toys in summer and the benefits of making them yourself.
The need for frozen dog toys in summer
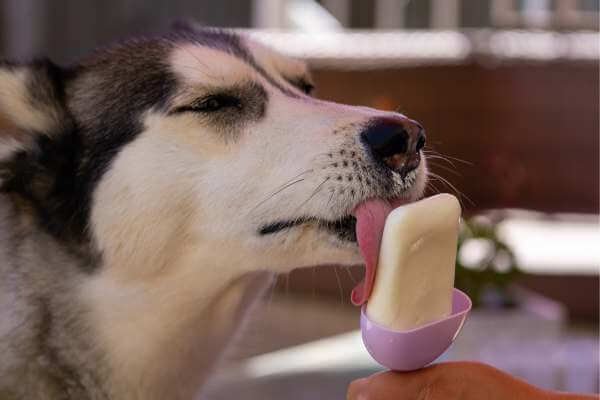
During the hot summer months, it’s important to keep our pets cool. Dogs, in particular, can overheat easily. They can’t sweat like humans do, so they rely on panting and releasing heat through their paw pads to cool down. Frozen dog toys can provide much-needed relief from the heat. They can lick and chew on these toys to help lower their body temperature. Plus, these toys can keep them entertained for hours, providing a fun distraction from the heat.
Benefits of DIY frozen dog toys
Making your own frozen dog toys has several benefits. Firstly, it’s cost-effective. You can use items you already have at home, like old toys, treats, and ice cube trays. Secondly, you can control what goes into the toy. This is especially important if your dog has dietary restrictions or allergies. Lastly, making these toys can be a fun and rewarding activity. You can experiment with different recipes and shapes, and it’s always a joy to see your pet enjoying something you’ve made.
In the following sections, we will guide you through the process of making your own frozen dog toys, including the materials you will need and a step-by-step guide. We will also provide tips for safe use and additional ideas to try. So, let’s get started and make this summer a cool one for your furry friend!
Materials Needed for DIY Frozen Dog Toys
Before we dive into the step-by-step guide to creating your own frozen dog toys, let’s first gather all the necessary materials. This will ensure a smooth and hassle-free process. Here’s what you’ll need:
Water: This is the primary ingredient for your DIY frozen dog toy. It’s readily available and safe for your pet. Plus, it’s a great way to keep your dog hydrated during hot summer days.
Freezable dog treats: These are optional but highly recommended. Adding treats to the frozen toy will make it more appealing to your dog. You can use anything from dog-friendly fruits like apples and bananas to specially-made dog treats. Just make sure they are safe to freeze.
Ice cube trays or silicone molds: These will give shape to your frozen dog toys. Ice cube trays are perfect for smaller dogs, while silicone molds can be used to create fun shapes for larger dogs. Make sure they are clean and safe to use for food items.


Now that we have all the materials ready, we can move on to the next section where we’ll guide you through the process of making your DIY frozen dog toys.
Step-by-Step Guide to Making DIY Frozen Dog Toys
Preparation
Before we dive into the process of making your own frozen dog toys, there are a few key steps you need to take to prepare. These steps will ensure that you have everything you need and that your workspace is ready for the task at hand.
Choosing the right freezable dog treats
Not all dog treats are suitable for freezing. You’ll want to choose treats that can withstand the freezing process without losing their flavor or nutritional value. Some good options include peanut butter, pieces of fruit like apples or bananas, and dog-friendly biscuits. Remember, the treats should be small enough to fit into your chosen mold or ice cube tray.
Preparing your workspace
It’s important to have a clean, organized workspace before you start. This will make the process smoother and more enjoyable. Clear off a counter or table, and make sure you have all your materials at hand. This includes your chosen treats, a mold or ice cube tray, and a freezer with enough space to store the toys while they freeze. It’s also a good idea to have a towel or paper towels nearby to clean up any spills.
Now that you’ve chosen your treats and prepared your workspace, you’re ready to start making your DIY frozen dog toys. Follow the steps in the next section to create a fun and refreshing treat for your furry friend.
Process
Now that we have our workspace ready and our treats selected, let’s dive into the process of making DIY frozen dog toys. This process is as easy as 1, 2, 3!
Step 1: Filling the Trays or Molds with Water
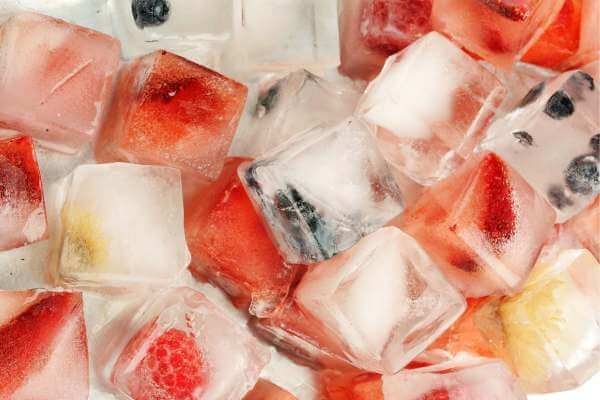
The first step in creating your DIY frozen dog toys is to fill your chosen trays or molds with water. It’s important to fill them only about halfway. This leaves room for the treats and ensures that the toys won’t be too large for your pet to enjoy. Remember, safety first!
Step 2: Adding the Treats
Next, it’s time to add the treats. You can use a variety of treats, depending on what your dog likes. Some popular options include small pieces of fruit, dog biscuits, or even peanut butter. Make sure to distribute the treats evenly throughout the water in the tray or mold. This will ensure that your pet gets a treat with every bite of the toy.
Step 3: Freezing the Toys
Finally, it’s time to freeze the toys. Place the trays or molds in your freezer. It will typically take about 3 to 4 hours for the toys to fully freeze. Once they’re frozen, they’re ready for your dog to enjoy! Remember to monitor your pet while they’re enjoying their new toy to ensure they’re safe and having fun.
And there you have it! With these three simple steps, you can create a fun and refreshing treat for your dog. Not only will these DIY frozen dog toys keep your pet entertained, but they’ll also help them stay cool in the hot summer months. Happy crafting!
Safe Use of DIY Frozen Dog Toys
Ensuring the safety of your furry friend is paramount when introducing them to new toys, especially DIY frozen dog toys. Let’s delve into the safe use of these toys, focusing on monitoring your dog while they play and knowing when to replace the toys.
Monitoring your dog while they play
It’s essential to keep an eye on your dog while they play with their new DIY frozen dog toy. This is not just to see the joy on their face, but also to ensure they are not trying to swallow large pieces that could potentially cause choking. Remember, while these toys are designed to be safe, accidents can still happen. So, always be vigilant.
When to replace the frozen dog toys
Just like any other toy, DIY frozen dog toys don’t last forever. But when should you replace them? Well, if you notice the toy is becoming too small or if it’s showing signs of wear and tear, it’s time to make a new one. Replacing the toy regularly ensures your dog always has a safe and enjoyable toy to play with.
In conclusion, DIY frozen dog toys are a great way to keep your dog entertained and cool, especially during the hot summer months. However, always remember to monitor your dog while they play and replace the toy when necessary to ensure their safety.
Additional Tips for DIY Frozen Dog Toys
Now that you know the basics of creating DIY frozen dog toys, let’s explore some additional tips to make this process even more fun and beneficial for your furry friend. These tips will not only add variety to your dog’s playtime but also cater to dogs of different sizes and preferences.
Using Different Treats for Variety
One of the best ways to keep your dog interested in their frozen toys is by using a variety of treats. Dogs, like humans, enjoy a change in their diet. You can use anything from their favorite kibble to small pieces of fruits and vegetables. Just remember to avoid foods that are harmful to dogs like chocolate, grapes, and onions. This variety will not only keep your dog excited about their toys but also provide them with a range of nutrients.
Making Toys of Different Sizes
Another important tip to keep in mind is the size of the toys. Just like children, dogs of different ages and sizes require different toy sizes. For smaller dogs or puppies, smaller toys are more appropriate as they are easier to handle and chew. On the other hand, larger dogs might need bigger toys to keep them engaged and to ensure they don’t swallow the toy. Always remember, the toy should be big enough so that your dog can’t swallow it but small enough for them to be able to hold it in their mouth.
By incorporating these additional tips, you can ensure that your DIY frozen dog toys are not only fun and engaging for your dog but also safe and nutritious. Remember, the goal is to create a toy that your dog will love and that will also contribute to their overall health and well-being.
Case Studies: DIY Frozen Dog Toys Success Stories
Let’s take a look at some real-life examples of pet owners who have successfully made and used DIY frozen dog toys. These stories will provide you with inspiration and show you the potential benefits of these homemade toys.
Case Study 1: Fido and the Frozen Treat
Meet Fido, a lively Labrador who loves to play. His owner, Sarah, was looking for a way to keep him entertained during the hot summer months. She decided to try making a DIY frozen dog toy.
Using a simple recipe of chicken broth and her dog’s favorite treats, Sarah created a frozen toy that not only kept Fido entertained but also helped him stay cool. Fido was thrilled with his new toy, and Sarah was happy to see him enjoying himself.
Not only did the frozen toy provide hours of fun for Fido, but it also had a positive impact on his health. Sarah noticed that Fido was more hydrated and his coat was shinier, likely due to the nutritious treats frozen inside the toy.
Case Study 2: Spot’s Summer Fun
Spot, a playful Dalmatian, lives in a warm climate where summers can be particularly harsh. His owner, Mike, wanted to find a way to help Spot stay cool and hydrated while also providing him with a fun activity.
Mike decided to make a DIY frozen dog toy using water, a few of Spot’s favorite toys, and some treats. The result was a large, icy block that Spot could lick, chew, and play with to his heart’s content.
The DIY frozen toy was a hit with Spot. He spent hours playing with it, and it helped him stay cool during the hot summer days. Mike was pleased to see Spot enjoying himself and plans to make more frozen toys in the future.
These case studies show that DIY frozen dog toys can be a great way to keep your dog entertained and cool during the hot summer months. Plus, they’re easy and inexpensive to make. Why not try making one for your furry friend?
Conclusion: The Joy of DIY Frozen Dog Toys
As we wrap up our discussion on DIY frozen dog toys, let’s take a moment to reflect on the journey we’ve taken together. We’ve learned about the materials needed, the steps to make them, and how to use them safely, and even heard some success stories. Now, it’s time to recap the benefits and encourage you to try it out for your furry friend.
Recap of the benefits of DIY frozen dog toys
DIY frozen dog toys are not just fun and exciting for your dogs, but they also provide numerous benefits. They are cost-effective, allowing you to save money while still providing your pet with high-quality toys. They are also a great way to keep your dog cool and hydrated during the hot summer months. Plus, these toys can help improve your dog’s dental health by promoting healthy chewing habits and reducing plaque buildup. Lastly, making these toys can strengthen the bond between you and your pet, as it involves spending quality time together.
Encouragement for dog owners to try it out
If you’re a dog owner who’s looking for a fun, affordable, and beneficial activity for your pet, DIY frozen dog toys are worth a try. Not only will you be able to provide your dog with a new and exciting toy, but you’ll also be doing something great for their health and well-being. So, why not give it a shot? Remember, the joy of DIY is in the process as much as the end product. Your dog will surely appreciate the effort and love you put into making their new favorite toy.
In conclusion, DIY frozen dog toys are more than just a fun activity. They are a testament to the love and care we have for our pets. So, go ahead and start your DIY journey today. Your dog will thank you for it!
Read also:
7 Tricks on How to Cool a Dog Down in Summer
4 Top Rated Cooling Pads for Dogs in 2024
Best Multivitamin for Dogs on Homemade Diet: How to Choose and Use Them